Operation Process Introduction
The Gauss Intelligent Textile MAS system can help you automatically collect production data from machines, allowing you to conveniently view real-time production status on your mobile phone, TV, or computer. It can also generate various statistical reports based on the time range you select. The system supports workers using their mobile phones to scan QR codes of machines for clocking in. The system will automatically record the worker's clock-in time and, according to the shift information set in the background, automatically record the output of the shift for the worker. The system can track the output of orders. When the output of an order reaches a set value, the system will automatically send notifications to customers.
1. Basic Settings
Shifts
Machine production data is categorized by department and shift in the backend. To ensure that data is correctly classified, we need to set up shift information.
Log in to the management backend, click Factory Management -> Shift Management. The interface is divided into three parts: the shift list on the left, the production group list on the right, and the shift scheduling at the bottom.
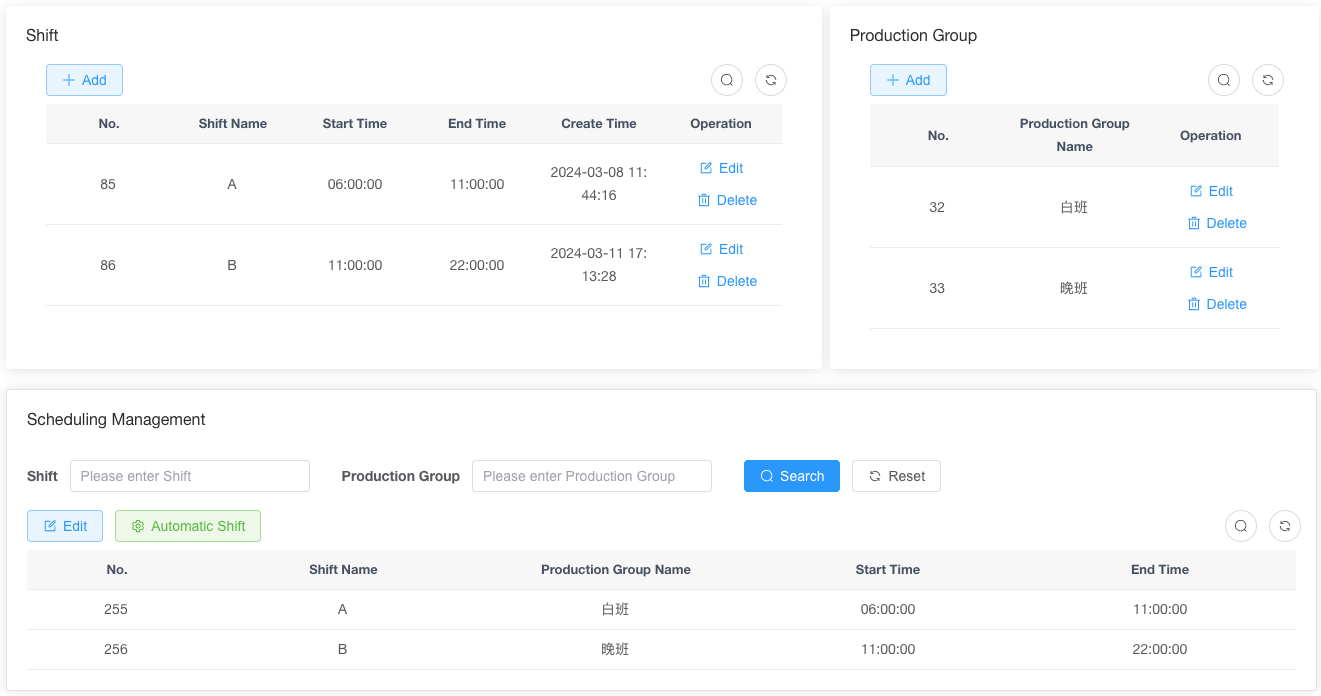
- Shift List Here, we set up shifts based on actual conditions. This example shows a two-shift setup: morning shift from 8 AM to 8 PM and night shift from 8 PM to 8 AM.
Production Group and Shift Scheduling Based on the number of shifts, add corresponding production groups here. Then, in the shift scheduling section, assign which group works which shift.
Departments
Departments are the foundation for production statistics and employee management. You can manage departments through Factory Management -> Department Management. Click "Add" to create a new department.
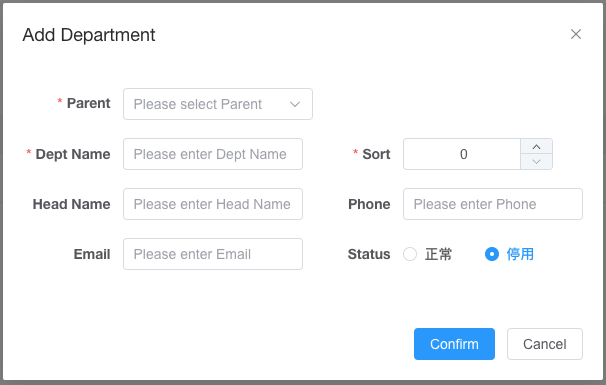
Select the parent department and department name; other fields can be left blank.
Employees
Click Production Management -> Employee Management to add employees.

- Enter the employee's name and select their department.
- Phone number and shift can be left blank.
- Set the employee login account (usually the employee's phone number) and password. Employees can log in to the mobile app to clock in using these credentials.
- Select "Normal" as the status.
- Choose the employee's role. Roles are divided into two types: department head and regular employee. Department heads can log in to the PC end to view and download departmental statistical reports and add employees. Regular employees can only log in to the mobile app to clock in.
Click "Confirm" to add the employee, after which they can log in to the mobile app.
2. Employee Clocking In
The employee clocking process requires more settings. If you do not need the employee production statistics feature, you can skip this step. If you want to enable employee production statistics, you need to use employee clocking to register employee production.
Preparations
Add Products
Log in to the management backend, click Factory Management -> Product Management -> Add Product.
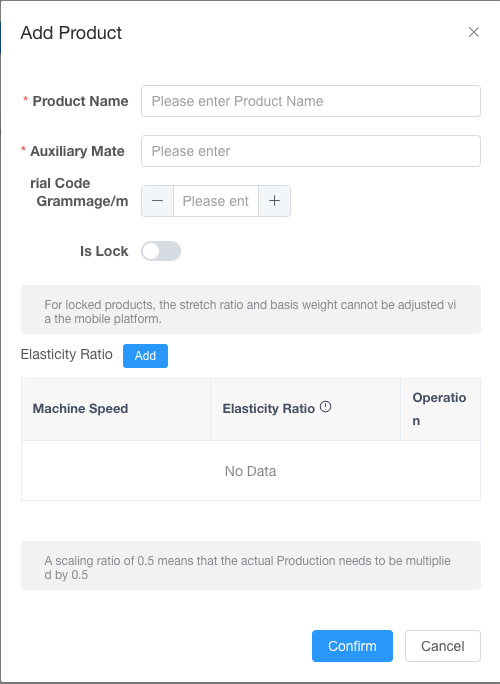
- Enter the product name, auxiliary material code, weight (optional, used for product weight).
- Choose whether to lock the product. If locked, employees cannot modify the product information on the mobile app.
- Click "Add" under the shrinkage ratio to set the product's shrinkage ratio. You can set different shrinkage ratios for multiple speeds. If unnecessary, setting one is sufficient.
Schedule Machines
Assign production orders to machines. Here, you can set the number of threads used by the machine.
There are two ways to schedule machines: managers can schedule them via the PC management backend, or employees can fill in order information on their mobile devices by scanning QR codes. 1. PC Management Backend Scheduling Log in to the management backend, click Production Management -> Machine Scheduling.
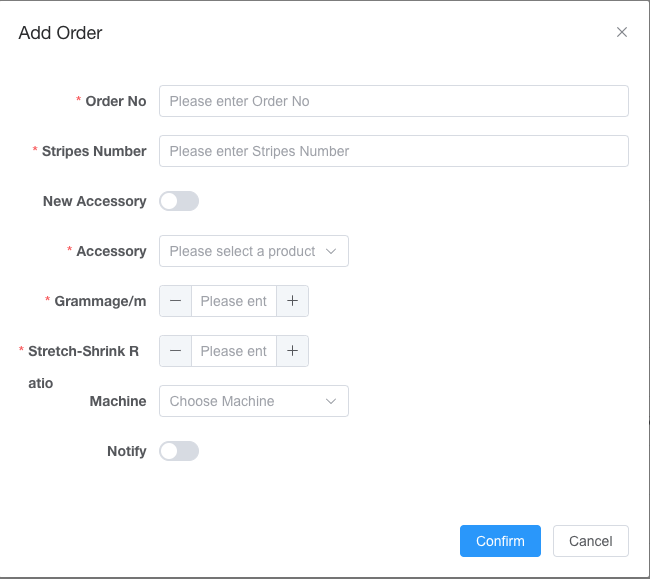
- Enter the order number and thread count.
- Select the auxiliary material. After selecting it, the weight and shrinkage ratio below will be filled in automatically.
- Choose the machine(s) to be scheduled. Only one machine is supported here. If you need to associate multiple machines with an order, use the order management function.
- If you want to receive production notifications, select the notification option.
Obtain QR Code
After installing the counter, you can obtain a QR code image from customer service for printing or display the QR code on the counter by pressing the leftmost button.
To associate machine production with the operator, employees need to scan the QR code on the machine every day when they start work.
Download APP
- Google Play Store Gauss Intelligent
- Apple App Store Gauss Intelligent
Daily Clocking In
- Employees log in to the Gauss Intelligent app using their accounts.
- Click the scan button in the top-right corner of the main screen.
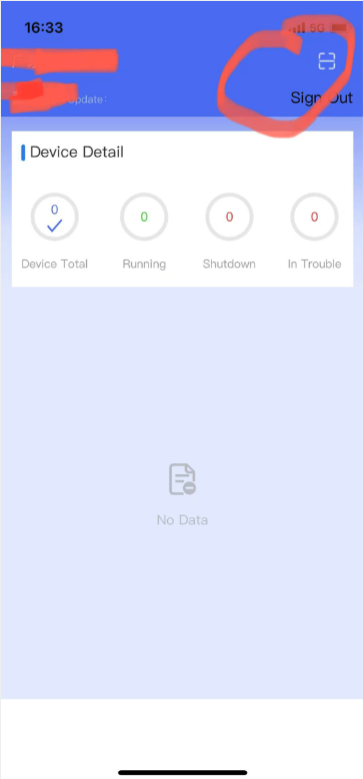
- Scan the QR code.
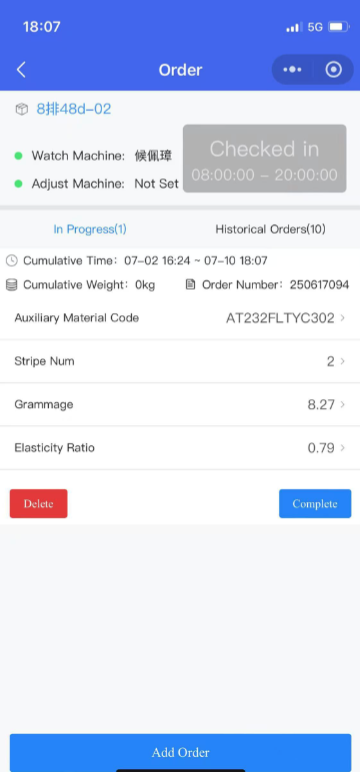
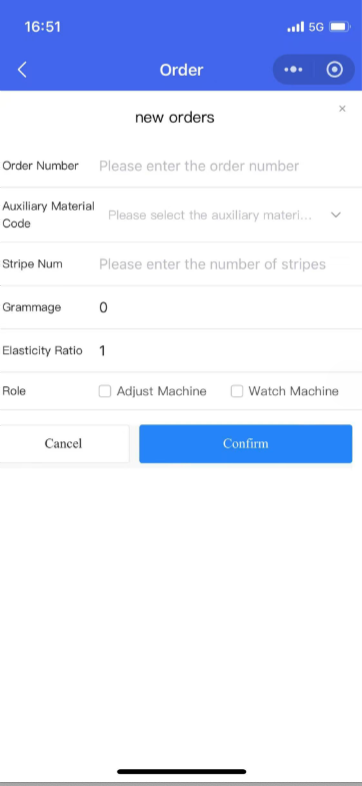
If no order has been assigned to the machine before, this page will appear, requiring employees to enter the order number, select the product, and specify the thread count on their mobile device.
If the machine already has an assigned order, this page will appear. Employees can click the clock-in button at the top. If the order is completed, they can also click the "Complete" button to finish production for that order.
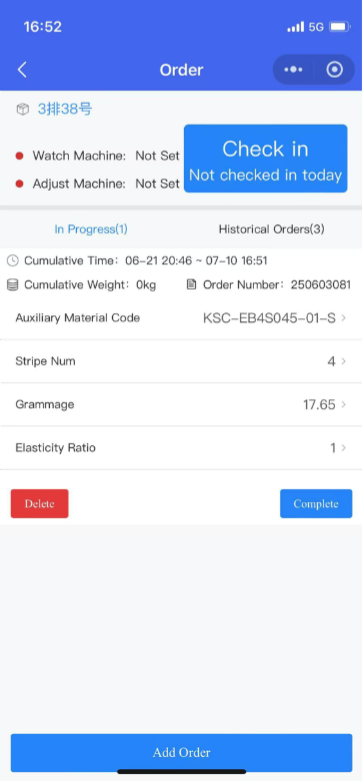
- Click the clock-in button. The system will record the clock-in information, and the button will change to "Clocked In."